| Comments |
| |
| Gracias por vuestro gran trabajo. |
|
| | |
| Additional Information |
| |
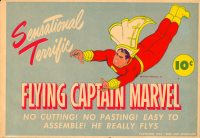
| Your flying Captain Marvel figure consists of two large parts - the figure itself and the cape and arms. Follow the steps carefully as you put him together. |
| |
| HOW TO ASSEMBLE YOUR FLYING CAPTAIN MARVEL |
| |
| STEP 1 - Unfold the sheet and lay it in front of you with the red side up. Carefully lift out the figure and then the cape and arms. |
| STEP 2 - Pick up the figure and bend part 1 back so that it goes behind part 2 (See Fig. 1). Crease on perforated line between 1 and 2. Do the same with 3 and 4. |
| STEP 3 - Bend part 5 down so that it is at right angles to part 2 and crease perforated line (6). Then carefully crease perforated line (7) and (8). Do the same with the other side of the figure. Bend sides C down so that they are between the two sides of the figure. |
| STEP 4 - Bend foot tabs A up so that they are inside of legs. Bend over outside flaps B so that they overlap tabs A lock the feet by pushing tabs B into slots B. |
| STEP 5 - Bend cape collar forward (See 9 in Fig. 1). Bend wings on Tab K upwards along dotted lines. (See II in Fig. I). Do the same with the other side of the figure. |
| STEP 6 - Bend bottom lobes of ears upward (See 10 in Fig. I). Gently pull one ear through slot in Captain Marvel's head. After ear is through slot unfold bottom lobe so that it locks ear in place. Do the same with the other side of head. |
| STEP 7 - Lock back of figure by pushing tab D into slot D and tabs EE into slots EE. |
| STEP 8 - Lay aside the figure and pick up the cape part (See figure 2). Bend arms down and under cape. Crease perforated lines 3 and 4. Pull arms down further under cape and crease perforated line 5. Bend flaps G back and under chest (parts 1 & 2). |
| STEP 9 - Crease perforated line 9 by gently pinching areas marked 7 and 8 together and running your thumb and forefinger along line 9 underneath the cape. Do the same with perforated line 10. Now crease perforated line 11 by pinching center sections together. (See Fig. 3). Push section (arrow in Fig. 3) down so that front of cape will sweep upward as in front view (Fig. 4). Lock arms in place by pushing tabs 4 through slots 4. |
| STEP 10 - Pick up figure and hold of tab K between thumb and index finger. (See Figure 5). Now push tab K through slot K on cape. Unfold wings of tab K and it will lock in place Do the same with tab J and slot J. |
| STEP 11 - Bend cape collar pieces back above cape so that they go behind tabs J and K. Your flying Captain Marvel is now finished and when viewed from the side will look like Fig. 6. |
| |
| HOW TO FLY CAPTAIN MARVEL |
| |
| Before you can make Captain Marvel fly through the air, you must add weight. Simply push a penny through the slots in the top of Captain Marvel's chest above the lightning flash. The tension of the paper will hold the penny in place (See Figure 7). Grasp the figure by the chest between the thumb and forefinger. Launch him through the air head first. Throw gently at first until you get the "feel". After a little experimenting, you will find that you con make him fly and soar so that he will land at a given spot. For greater flying range insert 2 pennies instead of one. |
| The data in the additional content section is courtesy of Galactic Central. |


